Dreamcatcher

Hello!

Sunday, 31 January 2016

DIY Mason Jar

DIY Mason Jar


Hello and welcome back

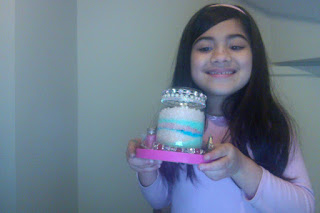
The lazy morning of a weekend inspired me to look for something around the house without a pretty home. Not long and I found Epson salts in the original package, which isn't very attractive in the bathroom. This cute DIY makes a bath more inviting and … yeah, with all the benefits on the label.


I loved playing around with the dyed salts
and it was so quick to make, just under ten minutes (with all the experimenting with pearl bracelets around the rim)!

This simple creation is easy to  put together.
All you need is salt, food colouring, mason jars and a spoon.


*G*O*O*D ~ M*O*R*N*I*N*G ! ! !    :-)

Saturday, 30 January 2016

Twine Craft


                              Twine Craft


Hello and welcome back to Dreamcatcher.


Last year I went to Brazil and I walked by lots of handmade twine lampshades, but I haven't really thought about making my own until now.
Today, the sun was shining for a change, I thought of making these twine lampshades to decorate my house, as the sun was too bright and so were the lights.
The twine lampshades can be used like a bowl of chocolates (yum), a flower pot decoration, a candle decoration or as in my last post I created my own stress balls, so you can fill it with them as well.
Twine is good for the environment, so that's a big thumbs up! 


in a bowl pour flour, hot water and glue 
dip the twine in and mix


wrap the twine around the blown up balloon


leave it to dry for 36 hours 


You can try to wrap twine on glass candles.
Happy wrapping!


: - )

Friday, 29 January 2016

Stress Ball


Stress ball

Hello, today my friends brought some stress balls to school
and told me that if I want to make one, I  just need to fill a balloon with flour.

I found stress balls relaxing and are great toys.


put a balloon through the funnel

fill the balloon with flour

take the balloon off the funnel and cut the top off

put some glue on the filled balloon and then cover it with an empty
 one

cut some holes in another balloon and cover your filled balloon

here are the final results
My clothes ended up in a floury mess but it is Friday so it doesn't matter as much.
I hope your stress balls worked and you didn't end up in a mess like me.


I was looking on youtube for DIY stress balls to see other ways of making them, and I found out that if you put a little bit of air in your stress balls you won't feel the flour as much (to put air in your balloon you can put the flour in a plastic bottle and squeeze the bottle to pump air and flour in the balloon), and they bounce too. However, I prefer to feel the flour because I can mould shapes with them, like clay!
this ball has air

Thanks for reading the stress ball post!
these balls have no air


Tuesday, 26 January 2016

Vanity Tray

                                Vanity Tray


Hello and welcome to Dreamcatcher!

I bought a picture frame and some spray paint and thought of doing a small tray to organise some brushes!
It's going to look nice on a vanity desk!

So today we are doing a vanity tray out of a picture frame!


Things you will need!

spray paint
printed fabric
beads
hot glue stick and gun
glitter
mod podge

put masking tape in the middle of the glass and spray
paint the glass

My main colour is pink as it's my favourite colour!
paint all the parts that you desire


cut out and glue on the square base 


draw the base on the back of the fabric


 once dried,  add everything together and
glue the beads on the bottom
so they resemble feet


cut out some fabric to make the border 


then let it dry and place the makeup brushes in a glass


This is not the finished piece yet. I will update this later when I add mod podge and glitter to give a sparkly appearance on the sides!


Come back later for an update!!!


Sunday, 24 January 2016

Millie's Cookies

                       Millie's Cookies 


                   Today I will teach you how to make Millie's Cookies!

I found lots of websites claiming that they have the best Millie's Cookies recipe but then I went on http://www.bbcgoodfood.com/recipes/1580654/millies-cookies-recipe 
and found one which was most like the real thing, and they tasted marvellous, just like the real ones!


                                   Ingredients:


                                  125g butter, softened
                                  100g light brown soft sugar
                                  125g caster sugar
                                  1 egg, lightly beaten
                                  1 tsp vanilla extract
                                  225g self raising flour
                                  1/2 tsp salt
                                  200g chocolate chips (optional)


ingredients
1.flour 2.sugars 3.butter 4.egg
                                            
1. preheat the oven to 180 degrees Celsius (gas mark 4).


2. cream the butter and sugars, once creamed add the egg and vanilla.


3. Sift in the flour and salt, then the chocolate chips.


mixing by hand


4. put small blobs on an ungreased baking paper (lots of websites recommended to pat them flat but I think this makes them crunchy, but I wanted a chewy inside) and put in the preheated oven for 7 to 12 minutes.


5. take it out of the oven and leave to harden before putting on a cooling rack.
finished look
they were yummy


Thanks for reading this. I hope you found these as yummy as I did!

Saturday, 23 January 2016

Upcycling!!!!

Upcycling
I found in Wikipedia:


"Upcycling, also known as creative reuse, is the process of transforming by-products, waste materials, useless and/or unwanted products into new materials or products of better quality or for better environmental value."


Okay! here is an example!


cut a cereal box

get craft tape, glue and scissors
get coloured paper
cut the coloured paper and do a collage
I did a different collage on every side of the box

and here's the finished piece


Friday, 22 January 2016

Art Tips


My portfolio


Hello everyone, today I want to show you some of my drawings and talk about them! Down below should be a video with some of my drawings for you to see!
I am a self-taught artist!
When I want to draw a picture I always have different types of pencils such as HB, 4H, H, 2B, 4B, 5B and 9B
I also have to have a sharpener, a really good rubber and a drawing pad!
When you are colouring you could use pens, pencils, oil pastels, watercolour, paint, crayons, and charcoal.


Thursday, 21 January 2016

Diary of a Wimpy Kid News

                  Diary of a Wimpy Kid 
                              News


I found out that Diary of a Wimpy Kid can be read in different languages!

                     This is in Portuguese 

' O Diario de um banana "


I find it interesting to know that 'wimpy kid' means 'banana' in Portuguese.

Now I understand, I think that books are translated in different languages when they are really successful in their first language, so the world can know about them!  


I found a trailer for Dog Days on youtube in Portuguese!
Watch it!

Guess what! They use voice-over technique, so the mouth moves and then they put a voice over it!


The voice-over for Greg Heffley in Brazilian-Portuguese is Fabricio Vila Verde!!!


I hope that you enjoyed these facts!!!!!!!!!!!!!!!!!!!!!!!!!!!!!!!!!!!!!!!


Wednesday, 20 January 2016

Candle craft

                                                 Candle Craft 
                     

              Hello and welcome back to Dreamcatcher!

At Christmas I got a candle making kit which I was delighted to have! So today I decided to show you how to make candles!
First we need to know what products we will use to make the candles.

                                What you will need
              
                1. Wax (as much wax you need to fill the mould)

      
                 2. Blue tack


                3. Dye (any colour)


                 4. Fragrance (any scent)


                5. Candle wick


                  6. A stick


                7. Mould


   Now that we have these items we can start our coloured candle!

* The first step is to tie the wick to the stick and place it on the mould

* Next we will take the end of the wick and thread it through the hole in the mould and put a bit of blue tack to stable it

* Heat a double boiler (no more than 185 degrees Fahrenheit) with water and pour some wax, also add some dye and fragrance

* Pour the melted wax in the moulds and put the moulds in the freezer for ten to twenty minutes

* Take the stick out and get the candle free

* Last but not least, light the candle to get an amazing scent

        That's it, you have made a candle! I hope this helped you! 


Tuesday, 19 January 2016

5 a day

                                                           5 A DAY

            Hello and welcome back to Dreamcatcher

Today I thought of our 5 A DAY and then I noticed that many people eat more fruit than vegetables!


For example, if you go out and buy a smoothie it is more likely to contain fruit than vegetables.


INGREDIENTS
1. strawberries, blackberries and raspberries
2. pineapples, oranges and mangoes
3. cherries and strawberries


If you are asked to choose between a fruit salad and a normal veg salad, many people will choose fruit salads, well at least kids would!


At Mc Donalds if you buy a happy meal, it will come with either carrot sticks or fries and if more people choose carrot sticks they
 would start to get into the habit of eating veggies as well as fruits!

What about our GREENS? They are just as important as the rest! Some of the most popular greens are  
                                 spinach and kale!

There are many other greens to eat which are part of your 5 A DAY but how often do we eat them? 

What about we do this little task? If you can eat 1 green  
a day for a month it means at the end of 1 month you will have eaten about 30 greens! Imagine how much nutrients you will get in your body!


What will I get from eating greens? 
Green vegetables are considered the best vegetables on the planet, in other words they are super foods! Spinach is high in iron and vitamins A, C, E and K and is also low in fat! While kale also has vitamins A, C and K and it has more calcium than milk!


Isn't a GREEN SMOOTHIE pretty?


What about a GREEN ICE LOLLY?


And what about KALE CHIPS?


So why don't you join my 30 DAYS GREEN CHALLENGE!!!!!!

 The name for this challenge is 'WHERE'S MY GREEN A DAY?'

Why don't you comment some pictures of green smoothies, ice lollies and kale chips that you have been eating!!

                              BON APPETIT

Monday, 18 January 2016

Diary of a wimpy kid


     Book Review on the new Diary of a Wimpy Kid


                                          Hello and welcome to DREAMCATCHER.

Today I thought it would be nice to do a book review on the new Diary of a Wimpy Kid! The book like any other Diary of a Wimpy Kid is extraordinary! This book is called Diary of a Wimpy Kid Old School because Greg Heffley (the main character) finds it hard to live without electronics at home like the olden days. His mum was the creator of a petition called 'lets unplug to reconnect'. As lots of people in town signed it, Greg was frustrated!

Grandpa moved to Greg's house because his rent got too costly! Now you can imagine how many adventures happened. To give you a quick taste of the book I'll tell you a bit about what happens next.

Although grandpa lost his driving license a year ago, he drove Greg to buy paint for the house. Grandpa was driving very quickly on the wrong side of the road and also used all the petrol in the car! So he can escape from being in trouble with his dad, Greg decided to go on the school trip (to the worst place ever) but his dad came to be a chaperone!